

In the first article of this series, you learned how to set up a GitHub Actions Workflow in a GitHub repository. Like learning many languages and technologies, we started out with code that printed a “Hello, World!” message. This process verifies that it’s possible to run a basic script.
The “Hello, World” script ran on a Linux VM provided by GitHub. Workflow code must run on a server, called a Runner. In this article, you’ll learn about the many options for using a GitHub-hosted runner, including Docker.
GitHub runner options
There are two main options for runners: self-hosted and GitHub-hosted. Each option has its benefits and drawbacks.
GitHub-hosted runners
When running your workflow on a GitHub-hosted runner, you have the choice of Linux, Windows, and macOS. See this documentation page to see the list of supported operating systems.
The GitHub-hosted runners are inexpensive to use, and typically free when using public repositories. This is why we left our test repository public). See this GitHub docs page for more information about billing when using private repos. Be sure to review the options, as different types of accounts have different time limits, measured in minutes per month. Linux runners are the least expensive to run.
The other benefit is that GitHub manages the runners for you. You do not need to worry about upgrades or patching, including the software installed on the images.
The downside is that you may need to install some tools during the run. Thankfully, there are many utilities installed by default. If you need something specific that’s not installed, such as Flyway, you can always create a Docker image with everything you need and just run the workflow on your Docker container.
GitHub-hosted runners live in the cloud, so any resources needed, such as a database server must be available to the runner. That means you may need to open certain ports or create network security groups, but it might not be possible to use GitHub-hosted runners for certain workloads, such as deploying database code.
There are also larger VMs available with advanced features if you have specific workloads or use cases that require more resources.
Self-Hosted runners
The other option is using virtual machines that you maintain either in a data center or in the cloud provider of your choice. The benefit is that you can tailor the operating system and tools to your exact specifications. Working through security requirements for accessing databases or other resources should be much easier than by using the GitHub-hosted runners.
The main downside of using your own runners is that you will need to maintain them and the software that is installed. You will most likely pay for licensing and storage of the VMs, but GitHub doesn’t charge you for the minutes that they run.
The next article in the series will cover self-hosted runners in detail.
Specifying a runner
The first article demonstrated how to run this “Hello, World” workflow:
|
1 2 3 4 5 6 7 8 9 10 |
name: Hello, World # Controls when the workflow will run, in this case manually on: workflow_dispatch jobs: PrintHelloWorld: name: Print Hello, World! runs-on: ubuntu-latest steps: - run: echo "Hello, World!" |
In the jobs: section, you can specify one or more jobs and one or more steps in each job. In this case, there is one job with one step. Notice the runs-on: code in the job specifying ubuntu-latest. This line in the code tells GitHub Actions to spin up a VM for running this workflow.
Instead of running on the latest version of ubuntu, you could run the job on any supported version of Ubuntu, Windows or, macOS. (See the documentation for the list of possible operating systems).
Notice that the runner is specified at the job level. The same runner will be used for all steps in the job, but a different runner will be created for the next job if there is one.
This example saves “Hello, World” to a file instead of displaying it. The next step runs a directory listing. Finally, a new job also runs a listing. You can find the code for this article here.
|
1 2 3 4 5 6 7 8 9 10 11 12 13 14 15 16 17 |
name: Hello, World # Controls when the workflow will run, in this case manually on: workflow_dispatch jobs: PrintHelloWorld: name: Print Hello, World! runs-on: ubuntu-latest steps: - run: echo "Hello, World!" > file.txt - run: ls PrintDirectory: name: Print directory needs: PrintHelloWorld runs-on: ubuntu-latest steps: - run: ls |
Note that you can edit the script locally in VS Code and then commit/push it to the repo. It’s also possible to edit the file directly in GitHub.
After running the workflow and clicking on the run, you’ll see the two jobs:
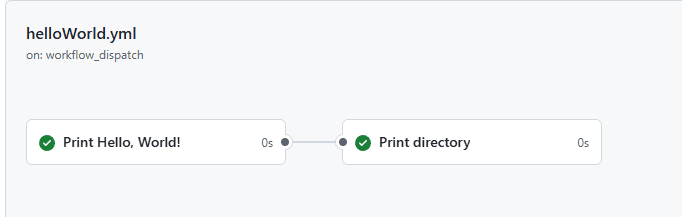
Image 1: Job steps
Notice that there is also a dependency created by the needs: statement. Print Directory cannot run unless Print Hello, World! is successful.
Drilling down into the first job, you’ll see that the file was created.
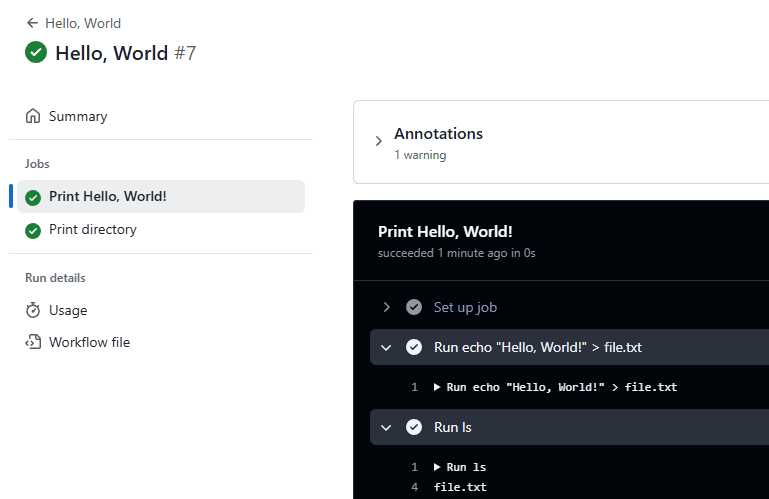
Image 2: The file was created
Notice that the second job doesn’t return the file because this job is running in a new VM.
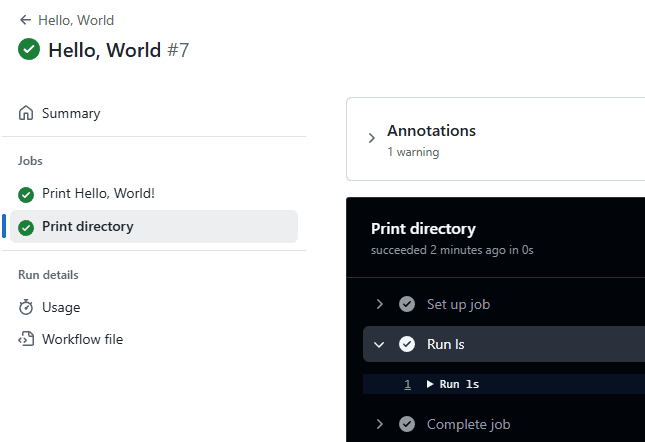
Image 3: The second job uses a new VM
You can even use different operating systems for specific jobs if you have the need.
Installing tools on a GitHub-hosted runner
As mentioned, there are utilities already available on GitHub-hosted runners, but you may not have everything you need. For example, you may want to run something like Flyway Community to deploy database changes. You can install tools by running commands as job steps.
This new workflow installs Flyway Community (code from the Flyway docs) and then tests to see that it’s in place. Be sure to save the new file in the .github\workflows folder and use the yml or yaml extension.
|
1 2 3 4 5 6 7 8 9 10 11 12 |
name: Install Flyway on: workflow_dispatch jobs: Install: name: Install Flyway runs-on: ubuntu-latest steps: - name: Install run: wget -qO- https://download.red-gate.com/maven/release/com/redgate/flyway/flyway-commandline/11.1.1/flyway-commandline-11.1.1-linux-x64.tar.gz | tar -xvz && sudo ln -s `pwd`/flyway-11.1.1/flyway /usr/local/bin - name: Check Install run: flyway --version |
After creating and running the new workflow, you should see results similar to this:
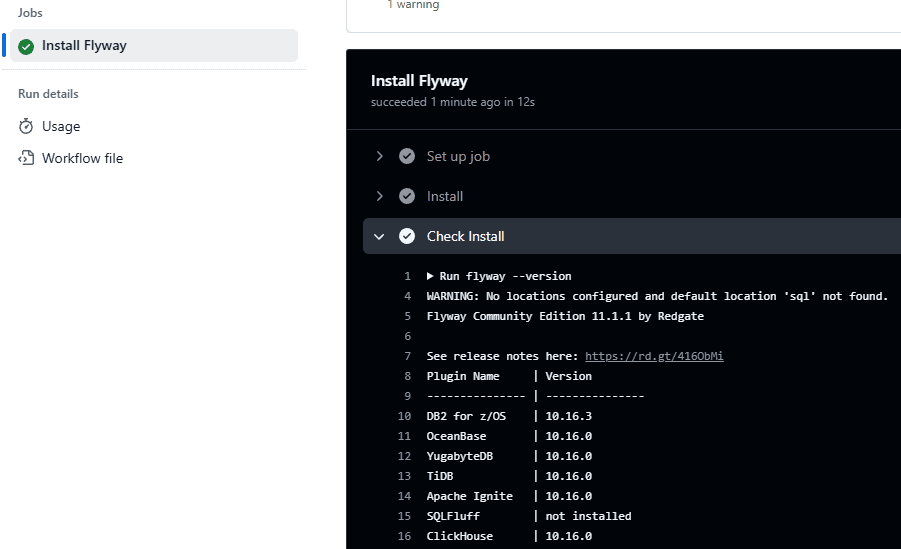
Image 4: Installing flyway results
If you added the job steps to the same job, you could run additional Flyway commands to deploy your database code.
Using Docker on a GitHub-hosted runner
Running a Docker container on the GitHub-hosted runner is a convenient option when you need software installed on the runner. You can use images managed by the software vendor or create an image yourself.
NOTE: Creating Docker images is beyond the scope of this article series.
For example, If you need Flyway, you can just use one of the images created by Redgate for Community or Paid editions.
Create this new workflow that runs Flyway in a Docker container. Be sure that the file extension is yml or yaml and that you save it in .github\workflows. Notice that the only addition to the code is the container: line specifying the name of the image.
|
1 2 3 4 5 6 7 8 9 10 11 |
name: Run Flyway on Docker on: workflow_dispatch jobs: runFlyway: name: Run Flyway runs-on: ubuntu-latest container: flyway/flyway steps: - name: runFlyway run: flyway --version |
After running the file, check the results. You’ll see results similar to this:
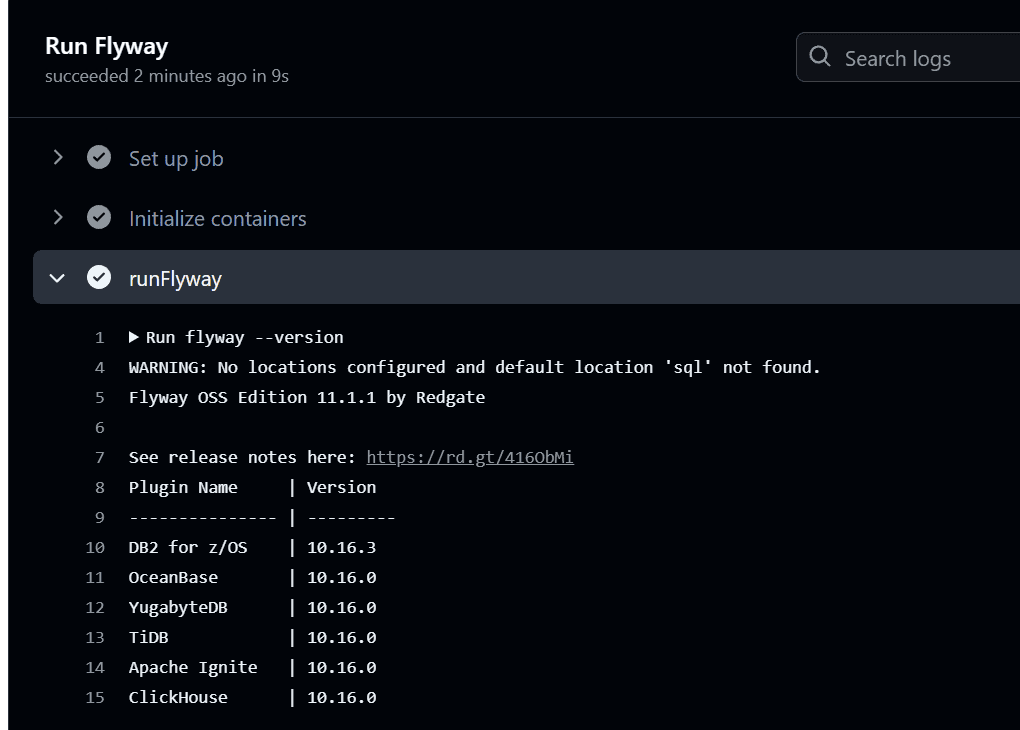
Image 5: The results of running Flyway in a Docker container
Conclusion
This article covered how to use Git-Hub hosted runners in your workflows. This is the most convenient way to run workflows if the VMs will meet your security requirements. You can choose from several versions of Ubuntu or Windows, and even macOS. These VMs have utilities installed, but it’s easy to install any other required tools. One of the best options is using Docker images from the software vendor.
The next article will discuss self-hosted runners.


Load comments